Video Cassette Recorder (VCR)

A.  Pengertian VCR
Perekam Kaset Video atau VCR (Video Cassette Recorder) adalah peralatan elektronik yang bisa dipakai untuk merekam suara (audio) dan gambar (video) dalam suatu kaset pita magnetik yang bisa dimasukkan dan dikeluarkan dengan mudah seperti halnya pita kaset suara biasa (Audio Cassette Recorder atau Cassette Recorder). Kebanyakan jenis VCR dilengkapi dengan rangkaian penala TV (TV-tuner) atau penerima yang dapat menerima siaran TV secara langsung. Untuk jenis yang lebih baik, VCR ini mempunyai rangkaian timer dan jam digital yang bisa dipakai untuk merekam siaran TV secara otomatis pada jam-jam yang diinginkan.

Secara umum, perekam kaset video (VCR) ini menggunakan pita kaset (tape)dengan 3 macam format: pita format VHS, pita format Betamax, dan pita format V2000.                        Di antara ketiga macam format ini, sekarang jenis format yang paling populer dipakai adalah pita kaset dengan format VHS.

§         Format VHS dari RCA dan JVC

Format VHS dalam dunia VCR dipromosikan pertama kali di Amerika Serikat pada bulan September 1976 oleh perusahaan elektronik RCA. Jenis pertama dari format ini mampu merekam video untuk waktu 2 jam. Jenis tape VHS yang baru yaitu tipe T-180 dengan kecepatan rekam yang lebih lambat (kualitas gambar sedikit kurang bagus) mampu merekam video selama 9 jam secara terus menerus. Selain perusahaan RCA, perusahaan elektronik JVC (Japanese Victor Company) di Jepang juga memasarkan produk VCRnya dengan menggunakan format VHS.


§         Format Betamax dari Sony

            Jenis format video Betamax atau sekedar disebut format Beta diperkenalkan oleh perusahaan Sony Jepang pada bulan November tahun 1975 (lebih dulu muncul dari pada format VHS). Perusahaan Sony menyatakan bahwa kualitas format Betamax ini lebih bagus jika dibandingkan dengan rekaman VHS, dan mempromosikan bersama-sama dengan peralatan rekaman Betacam.

§         Format V2000 dari Phillips

            Selain dua format VHS dan format Betamax, perusahaan Phillips (dari Belanda) pada tahun 1978 memperkenalkan format lain yang disebut format V2000 atau Video-2000 yang produknya hanya dipasarkan di Eropa saja. Bersama-sama dengan perusahaan elektronik Grundig dan perusahaan LOEWE, Phillips memproduksi kaset format V2000 ini, dan mampu merekam video selama 4 jam. Namun karena persaingan yang tinggi, jenis format V2000 ini sekarang tidak populer lagi.

B.    Perkembangan VCR
            Awalnya Charles Ginsburg pada tahun 1951 menciptakan sebuah videotape recorder  yang mampu menangkap gambar-gambar bergerak dari sinyal dengan mengubah rangsangan elektrik dan menyimpan informasi pada sebuah kaset magnetik. Pada 1956 VTR (video tape recorder) mulai dipasarkan. Kemudian Video Cassette Recorder dibuat pertama kali oleh Charles Ginsburg dan Ray Dolby pada 1956, dan mulai dipasarkan pada tahun 1971.
            Di Indonesia Video Cassette Recorder sempat menjadi populer pada sekitar tahun 1980-an, sebagai sebuah alternatif hiburan bagi masyarakat. Namun sekarang VCR ini sudah jarang dipakai, karena banyak alternatif perangkat lain yang lebih mudah dipakai. Masyarakat sudah jarang menggunakan VCR, namun alat ini tetap dipakai dalam rangka perekaman film dalam produksi program-program televisi.

C.   Bagian Pendukung Kerja VCR

            Ada beberapa bagian penting yang harus dimiliki dalam pemenuhan standar kerja VCR, yaitu:
§         Kaset (Tape)
            Saat kita membuka satu per satu bagiannnya, akan kita temukan Pertama, bagian atas dan bawah pada lapis terluar, yang biasanya terbuat dari plastik. Kemudian sebuah pintu “bergerak” yang melindungi kaset agar kaset dapat dibuka dan ditutup dengan mudah. Didalamnya, terdapat dua buah spul untuk memegangi pita kaset. Kemudian akan kita temukan pita kaset berukuran 244 m, 0,5 inci, terbuat dari oxide coated Mylar sebagai media perekam materi, dan beberapa rol pemutar yang memutar pita sampai bagian depan kaset. Dan dua buah media sebagai pengunci yang menahan pita agar tidak memutar kembali. Juga berbagai jenis sekrup yang memperkuat bagian-bagian tersebut, pada saat kaset dimasukkan ke dalam VCR, maka ada sebuah “lever”yaitu sebuah optik untuk mengoperasikan alat atau mesin, pada posisi tertentu. Kerjanya diperkuat dengan tersedianya sebuah “pin”, sebuah tembaga berukuran kecil dengan bentuk lingkaran, digunakan untuk mempererat ketersambungan beberapa alat. Pada point tersebut, sistem dalam VCR akan “mengurai” memori pada pita kaset, kemudian memainkannya.
§         VCR
Video Cassette Recorder dibuat pertama kali oleh Charles Ginsburg dan Ray Dolby pada 1956. alat ini populer digunakan dalam rangka pengembangan sistem penyiaran televisi, karena apa yang ditayangkan pada pertama kali sekarang akan dapat diputar kembali pada waktu yang lain.
VCR sendiri memiliki dua tugas utama, yaitu mengadakan kontak dengan pita kaset, sebuah alat yang sangat tipis, sangat lemah dan mudah sekali rusak, dengan ukuran panjang yang tidak terukur dalam sebuah plastik, dan membaca sinyal dari pita kaset dan “memaknainya” dengan sinyal yang bisa dimengerti oleh televisi. Tugas kedua diatas merupakan sebuah kemajuan teknologi yang tinggi dalam waktu singkat.
Pada perekaman suara, informasi suara disimpan secara linear pada kaset. Kemudian kaset bergerak melewati “kepala perekam” dan informasi suara tersebut diletakkan sebagai sebuah garis panjang yang mengikuti pergerakan pita kaset. Kaset ini dapat bergerak melewati kepala perekam tersebut dengan ukuran 2 sampai 3 inci (5 sampai 8 cm) per detik.
Sinyal video terdiri sekitar 500 kali lebih banyak informasi dibandingkan dengan sinyal bunyi, dikarenakan beberapa pendekatan pekerjaan tidak dapat dikerjakan oleh beberapa hal. Namun kaset harus tetap bergerak melewati kepala perekam tersebut beberapa kaki per detik. Untuk mengatasi masalah ini, dua kepala perekam terorganisi bersama pada sebuah drum putar yang digerakkan kearah yang lebih tinggi dari posisi kaset.

D.  Kerjasama VCR dengan Televisi
Gambar dalam televisi dibagi dalam beberapa series dalam 525 garis scan horizontal, setengahnya ditayangkan setiap 60 detik. Masing-masing melewati kepala perekam dari VCR yang membaca atau menulis data dalam satu lembaran (262,6 garis scan) dari gambar televisi. Sehingga data perekaman videotape adalah sebagai berikut:
Dalam hal ini, akan ada beberapa bagian yang direpresentasikan oleh beberapa warna. Bagian cahaya biru merupakan lembaran yang disediakan bagi perekaman yang dilakukan oleh kepala perekam dalam drum berputar. Drum berputar terdiri dari dua kutub pada posisi yang berlawanan (180 derajat jarak). Dua kutub ini memberikan alternatif bagi masing-masing bagian untuk membaca dan menulis data pada pita kaset.Dan bagian yang berwana kuning me-representasikan sebuah audio control track.
Alat pengontrol ini penting karena pertama ia berfungsi sebagai pengontrol kerja VCR dalam melakukan perekaman, pada mode SP, LP ataupun EP, juga mengatur seberapa cepat VCR akan menarik kaset melewati drum pemutar, dan mempertahankan posisi pita pada saat pita tersebut dimainkan.
            Saat kita bermain dengan pemutaran track rekaman pengontrol pada VCR, kita hanya perlu memindahkan posisi “skew” antara pengontrol track dengan posisi kepala perekam.

E.    Kerjasama VCR dengan Kaset
Hubungan antara kaset dengan pemutar di dalam VCR adalah sebagai berikut, Pertama kepala berputar pada 1800 rotasi per menit, atau 30 pergantian per detik.Pada mode SP, kaset akan melewati kepala pemutar pada garis 1,31 inci per menit (33,35 mmps), pada mode LP pada 0.66 inci per detik (16,7 mmps, dan pada mode EP pada 0,44 inci per detik (11,12 mmps. Karena rotasi inilah kepala tersebut berputar pada 228,5 inci(5804 mm) per detik, atau dengan kata lain berputar pada 25 mil per jam. Artinya apabila video menyimpan informasi secara linear,maka anda akan memerlukan 50 mil (80 km) untuk sebuah kaset dapat menyimpan film dengan durasi 2 jam.
Sebuah bagian yang dikatehui sebagai helical scanning akan membantu pemutaran kaset. Masalahnya adalah bagaimana cara membuat desain sebuah bentuk VCR yang bisa membungkus kaset video dalam putaran kepala perekam dengan tujuan perekaman ataupun pemutaran memori kaset. Selain itu mesin juga harus dapat mempertahankan pergerakan kaset pada posisi tertentu yang seimbang dengan kecepatan putaran yang pas dan mampu diidentifikasi dan berhenti dengan tepat. Untuk melakukan tugas ini, VCR harus mengikuti langkah sebagi berikut:
Mekanisme driver dalam VCR harus dapat mengurai dengan baik pita panjang dari kaset dan membungkusnya dalam sebuah rol dengan kombinasi drum dan kepala perekam untuk dapat memainkannya. Ini merupakan pekerjaan paling berat yang harus dikerjakan oleh VCR.

F.    Isi Kerangka dalam VCR
§         Terdapat di dalam RCA VCR
§         Terdapat drum pemutar
§         Ketika VCR mulai membaca kaset, dua pemutar yang akan menarik kaset keluar dari VCR.Mereka akan bergerak pada rel dan membungkus perekam disekitar drum
§         Ketika kaset untuk pertama kalinya didudukan pada VCR, dua pemutar ini akan langsung masuk pada kaset, di belakang perekam, kaset akan melakukan penyesuaian posisi dengan perekam pada saat ini
§         Ketika pemutar bekerja dengan baik pada track,kaset akan berputar dengan baik disekitar drum
§         Sebuah kunci pemutar akan menahan gerakan berputar dari kepala perekam

G.  Sistem Pengontrolan VCR

            Beberapa pengaturan yang diberlakukan antara lain:
§         Tracking Control, kasetnya terdiri dari sebuah pengaturan track linear yang membantu VCR sebagai penyeimbang putaran rotasi dengan pita perekam pada kaset.
§         Flying Erase Head, VCR memiliki dua tipe flying erase head, alat ini sebenarnya di-organisir dalam drum pemutar. Mampu menghapus memori dalam pita dengan mempersilahkan pembersihan di antara segment tersebut.
§         SP, LP, dan EP settings, ini merupakan tiga macam kecepatan yang di set dalam sebuah VCR yang akan melakukan pengaturan kecepatan pada kaset yang berhubungan dengan drum pemutar. SP mode, dimana kaset bergerak melampaui kepala perekam dalam 1,31 inci (33,35 mm) per detik. Dalam LP mode, sejauh 0,66 inci (16,7 mm) per detik, EP mode sejauh 0,44 inci (11,12 mm) per detik. Selama kecepatan kaset bertambah, pita dalam kaset akan bergerak semakin dekat satu sama lain, mengurangi kemampuan pencitraaan tapi menambah jumlah materi yang cocok untuk kaset.
§         Four-head vs Two-head, sebuah VCR membutuhkan hanya dua kepala untuk menyimpan atau memainkan kaset pada mode SP. Sebuah masalah timbul, pada saat LP dan EP mode, karena kaset akan bergerak jauh lebih lambat. Untuk itu kebanyakan VCR memiliki dua kepala pemutar untuk SP mode dan dua kepala yang lebih kecil digunakan untuk pemutaran kecepatan lebih lambat. Gabungan empat kepala ini akan menyajikan sebuah sistem kerja yang lebih baik pada pemutaran dalam kecepatan yang lebih rendah.
§         End-of-tape sensing, saat VCR sudah tidak beroperasi, akan tampak sebuah cahaya melalui kaset dan mengidentifikasikan bahwa tugas telah selesai.

H.  Kesimpulan
Sebuah sejarah dalam revolusi perekaman, VCR pernah menjadi sebuah fenomena dalam sejarah perkembangan teknologi. Sekarang perkembangan teknologi tinggi telah mempermudah dan mendukung manusia dalam menjalankan kesehariannnya. Video Cassette Recorder populer digunakan dalam industri televisi, khususnya dalam rangka pembuatan program-program televisi, dalam perkembangannya VCR ini juga digunakan dalam perekaman kegiatan-kegiaatan (event) tertentu misalnya dalam rangka pengamanan, penyelenggaraan kesepakatan, kegiatan-kegiatan politik, dsb. Namun sekarang VCR ini tidak lazim digunakan di kalangan masyarakat umum, dikarenakan memerlukan alat yang cukup rumit dan harganya lebih tinggi jika dibandingkan dengan teknologi pemutaran video terbaru yaitu VCD atapun DVD.

 

belajar HTML


Creating an HTML Page

web page is created using a language called, Hypertext Markup Language, better known as HTML Code. You can write your own coding within a plain text editor, such as Note Pad, or use an HTML editor, which will write the code for you.

HTML codes, also referred to as HTML tags, are enclosed by the lesser than (<) and greater than (>) brackets and may be written in capital or lower case letters.

The opening bracket is followed by an element, which is a browser command, and ends with the closing bracket.

<font size=2>

An element may also be followed by attributes, which are words describing the properties of the element, and further instruct the browser.

<font size=2>

Attributes are only contained in the opening HTML tags to the right of the element and are separated by a space and followed by an equal (=) sign.

The value follows the equal sign and is enclosed in quotes.

<font size=2>


Basic HTML Document Code Structure

Begin writing your HTML tags by creating your document's basic layout. Copy and paste this code into your text or HTML editor.
<html>
<head>
<title>Your Page Title</title>
</head>
<body>

This area will contain everything that will be visible through a web browser, such as text and graphics. All of the information will be HTML coded.

For a complete list of HTML codes, tags and examples, see the HTML chart below.

</body>
</html>
<html> - Begins your HTML document.

<head> - Contains information about the page such as the TITLE, META tags for proper Search Engine indexing, STYLE tags, which determine the page layout, and JavaScript coding for special effects.


<title> - The TITLE of your page. This will be visible in the title bar of the viewers’ browser.

</title> - Closes the HTML <title> tag.

</head> - Closes the HTML <head> tag.

<body> - This is where you will begin writing your document and placing your HTML codes.

</body> - Closes the HTML <body> tag.

</html> - Closes the <html> tag.


How to Copy and Paste HTML Tags / Codes

To copy and paste the HTML tags / codes from the HTML chart below into the HTML of your web page, place your mouse pointer over the beginning of the HTML code you would like to copy.  Next, click and hold your left mouse button and drag your mouse over all the HTML code you would like to copy (Example of highlighted text). Your HTML code should now be highlighted. Go to "Edit" - "Copy" on your web browser's toolbar and then place your cursor within your HTML code where you would like to place the code. Right click on your mouse and go to "Paste." Your HTML code should now be displaying within your HTML document.
HTML Tags Chart
To use any of the following HTML tags, simply select the HTML code you'd like and copy and paste it into your web page.
Tag
Name
Code Example
Browser View
<!--comment<!--This can be viewed in the HTML part of a document-->Nothing will show (Tip)
<a -anchor<a href="http://www.domain.com/">
Visit Our Site</a>
Visit Our Site (Tip)
<b>bold<b>Example</b>Example
<big>big (text)<big>Example</big>Example (Tip)
<body>body of HTML document<body>The content of your HTML page</body>Contents of your web page (Tip)
<br>line breakThe contents of your page<br>The contents of your pageThe contents of your web page
The contents of your web page
<center>center<center>This will center your contents</center>
This will center your contents
<dd>definition description<dl>
<dt>Definition Term</dt>
<dd>Definition of the term</dd>
<dt>Definition Term</dt>
<dd>Definition of the term</dd>
</dl>
Definition Term
Definition of the term
Definition Term
Definition of the term
<dl>definition list<dl>
<dt>Definition Term</dt>
<dd>Definition of the term</dd>
<dt>Definition Term</dt>
<dd>Definition of the term</dd>
</dl>
Definition Term
Definition of the term
Definition Term
Definition of the term
<dt>definition term<dl>
<dt>Definition Term</dt>
<dd>Definition of the term</dd>
<dt>Definition Term</dt>
<dd>Definition of the term</dd>
</dl>
Definition Term
Definition of the term
Definition Term
Definition of the term
<em>emphasisThis is an <em>Example</em> of using the emphasis tagThis is an Example of using the emphasis tag
<embed>embed object<embed src="yourfile.mid" width="100%" height="60" align="center">
(Tip)
<embed>embed object<embed src="yourfile.mid" autostart="true" hidden="false" loop="false">
<noembed><bgsound src="yourfile.mid" loop="1"></noembed>


Music will begin playing when your page is loaded and will only play one time. A control panel will be displayed to enable your visitors to stop the music.
<font>font<font face="Times New Roman">Example</font>Example (Tip)
<font>font<font face="Times New Roman" size="4">Example</font>Example (Tip)
<font>font<font face="Times New Roman" size="+3" color="#ff0000">Example</font>Example (Tip)
<form>form<form action="mailto:you@yourdomain.com">
Name: <input name="Name" value="" size="10"><br>
Email: <input name="Email" value="" size="10"><br>
<center><input type="submit"></center>
</form>
Name:  (Tip)
Email: 
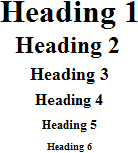
<h1>
<h2>
<h3>
<h4>
<h5>
<h6>
heading 1
heading 2
heading 3
heading 4
heading 5
heading 6
<h1>Heading 1 Example</h1>
<h2>Heading 2 Example</h2>
<h3>Heading 3 Example</h3>
<h4>Heading 4 Example</h4>
<h5>Heading 5 Example</h5>
<h6>Heading 6 Example</h6>

<head>heading of HTML document<head>Contains elements describing the document</head>Nothing will show
<hr>horizontal rule<hr />
Contents of your web page (Tip)

Contents of your web page
<hr>horizontal rule<hr width="50%" size="3" />Contents of your web page

Contents of your web page
<hr>horizontal rule<hr width="50%" size="3" noshade />Contents of your web page

Contents of your web page
<hr>
(Internet
Explorer)
horizontal rule<hr width="75%" color="#ff0000" size="4" />Contents of your web page

Contents of your web page
<hr>
(Internet
Explorer)
horizontal rule<hr width="25%" color="#6699ff" size="6" />Contents of your web page

Contents of your web page
<html>hypertext markup language<html><head>
<meta>
<title>Title of your web page</title>
</head>
<body>HTML web page contents
</body>
</html>
Contents of your web page
<i>italic<i>Example</i>Example
<img>image<img src="Earth.gif" width="41" height="41" border="0" alt="text describing the image" />a sentence about your site (Tip)
<input>input fieldExample 1:

<form method=post action="/cgi-bin/example.cgi">
<input type="text" size="10" maxlength="30">
<input type="Submit" value="Submit">
</form>
Example 1: (Tip)

 
<input>
(Internet Explorer)
input fieldExample 2:

<form method=post action="/cgi-bin/example.cgi">
<input type="text" style="color: #ffffff; font-family: Verdana; font-weight: bold; font-size: 12px; background-color: #72a4d2;" size="10" maxlength="30">
<input type="Submit" value="Submit">
</form>
Example 2: (Tip)

 
<input>input fieldExample 3:

<form method=post action="/cgi-bin/example.cgi">
<table border="0" cellspacing="0" cellpadding="2"><tr><td bgcolor="#8463ff"><input type="text" size="10" maxlength="30"></td><td bgcolor="#8463ff" valign="Middle"> <input type="image" name="submit" src="yourimage.gif"></td></tr> </table>
</form>
Example 3: (Tip)

<input>input fieldExample 4:

<form method=post action="/cgi-bin/example.cgi">
Enter Your Comments:<br>
<textarea wrap="virtual" name="Comments" rows=3 cols=20 maxlength=100></textarea><br>
<input type="Submit" value="Submit">
<input type="Reset" value="Clear">
</form>
Example 4: (Tip)


<input>input fieldExample 5:

<form method=post action="/cgi-bin/example.cgi">
<center>
Select an option:
<select>
<option >option 1</option>
<option selected>option 2</option>
<option>option 3</option>
<option>option 4</option>
<option>option 5</option>
<option>option 6</option>
</select><br>
<input type="Submit" value="Submit"></center>
</form>
Example 5: Tip)

Select an option: 
<input>input fieldExample 6:

<form method=post action="/cgi-bin/example.cgi">
Select an option:<br>
<input type="radio" name="option"> Option 1
<input type="radio" name="option" checked> Option 2
<input type="radio" name="option"> Option 3
<br>
<br>
Select an option:<br>
<input type="checkbox" name="selection"> Selection 1
<input type="checkbox" name="selection" checked> Selection 2
<input type="checkbox" name="selection"> Selection 3
<input type="Submit" value="Submit">
</form>
Example 6: (Tip)

Select an option:
 Option 1
 Option 2
 Option 3

Select an option:
 Selection 1
 Selection 2
 Selection 3
<li>list itemExample 1:

<menu>
<li type="disc">List item 1</li>
<li type="circle">List item 2</li>
<li type="square">List item 3</li>
</MENU>

Example 2:

<ol type="i">
<li>List item 1</li>
<li>List item 2</li>
<li>List item 3</li>
<li>List item 4</li>
</ol>
Example 1: (Tip)
  • List item 1
  • List item 2
  • List item 3

Example 2:
  1. List item 1
  2. List item 2
  3. List item 3
  4. List item 4
<link>link<head>
<link rel="stylesheet" type="text/css" href="style.css" />
</head>
<marquee>
(Internet
Explorer)
scrolling text<marquee bgcolor="#cccccc" loop="-1" scrollamount="2" width="100%">Example Marquee</marquee>Example Marquee(Tip)
<menu>menu<menu>
<li type="disc">List item 1</li>
<li type="circle">List item 2</li>
<li type="square">List item 3</li>
</menu>
  • List item 1
  • List item 2
  • List item 3
<meta>meta<meta name="Description" content="Description of your site">
<meta name="keywords" content="keywords describing your site">
Nothing will show (Tip)
<meta>meta<meta HTTP-EQUIV="Refresh" CONTENT="4;URL=http://www.yourdomain.com/">Nothing will show (Tip)
<meta>meta<meta http-equiv="Pragma" content="no-cache">Nothing will show (Tip)
<meta>meta<meta name="rating" content="General">Nothing will show (Tip)
<meta>meta<meta name="robots" content="all">Nothing will show (Tip)
<meta>meta<meta name="robots" content="noindex,follow">Nothing will show (Tip)
<ol>ordered listNumbered

<ol>
<li>List item 1</li>
<li>List item 2</li>
<li>List item 3</li>
<li>List item 4</li>
</ol>

Numbered Special Start

<ol start="5">
<li>List item 1</li>
<li>List item 2</li>
<li>List item 3</li>
<li>List item 4</li>
</ol>

Lowercase Letters
<ol type="a">
<li>List item 1</li>
<li>List item 2</li>
<li>List item 3</li>
<li>List item 4</li>
</ol>

Capital Letters
<ol type="A">
<li>List item 1</li>
<li>List item 2</li>
<li>List item 3</li>
<li>List item 4</li>
</ol>

Capital Letters Special Start
<ol type="A" start="3">
<li>List item 1</li>
<li>List item 2</li>
<li>List item 3</li>
<li>List item 4</li>
</ol>

Lowercase Roman Numerals
<ol type="i">
<li>List item 1</li>
<li>List item 2</li>
<li>List item 3</li>
<li>List item 4</li>
</ol>

Capital Roman Numerals
<ol type="I">
<li>List item 1</li>
<li>List item 2</li>
<li>List item 3</li>
<li>List item 4</li>
</ol>

Capital Roman Numerals Special Start
<ol type="I" start="7">
<li>List item 1</li>
<li>List item 2</li>
<li>List item 3</li>
<li>List item 4</li>
</ol>
Numbered
  1. List item 1
  2. List item 2
  3. List item 3
  4. List item 4
Numbered Special Start
  1. List item 1
  2. List item 2
  3. List item 3
  4. List item 4
Lowercase Letters
  1. List item 1
  2. List item 2
  3. List item 3
  4. List item 4
Capital Letters
  1. List item 1
  2. List item 2
  3. List item 3
  4. List item 4
Capital Letters Special Start
  1. List item 1
  2. List item 2
  3. List item 3
  4. List item 4
Lowercase Roman Numerals
  1. List item 1
  2. List item 2
  3. List item 3
  4. List item 4
Capital Roman Numerals
  1. List item 1
  2. List item 2
  3. List item 3
  4. List item 4
Capital Roman Numerals Special Start
  1. List item 1
  2. List item 2
  3. List item 3
  4. List item 4
<option>listbox option<form method=post action="/cgi-bin/example.cgi">
<center>
Select an option:
<select>
<option>option 1</option>
<option selected>option 2</option>
<option>option 3</option>
<option>option 4</option>
<option>option 5</option>
<option>option 6</option>
</select><br>
</center>
</form>
Select an option: (Tip)
<p>paragraphThis is an example displaying the use of the paragraph tag. <p> This will create a line break and a space between lines.

Attributes:

Example 1:<br>
<br>
<p align="left">
This is an example<br>
displaying the use<br>
of the paragraph tag.<br>
<br>
Example 2:<br>
<br>
<p align="right">
This is an example<br>
displaying the use<br>
of the paragraph tag.<br>
<br>
Example 3:<br>
<br>
<p align="center">
This is an example<br>
displaying the use<br>
of the paragraph tag.
This is an example displaying the use of the paragraph tag.
This will create a line break and a space between lines.

Attributes:

Example 1:

This is an example
displaying the use
of the paragraph tag.
Example 2:

This is an example
displaying the use
of the paragraph tag.
Example 3:

This is an example
displaying the use
of the paragraph tag.
<small>small (text)<small>Example</small>Example (Tip)
<strike>deleted text<strike>Example</strike>Example
<strong>strong emphasis<strong>Example</strong>Example
<table>tableExample 1:

<table border="4" cellpadding="2" cellspacing="2" width="100%">
<tr>
<td>Column 1</td>
<td>Column 2</td>
</tr>
</table>

Example 2: (Internet Explorer)

<table border="2" bordercolor="#336699" cellpadding="2" cellspacing="2" width="100%">
<tr>
<td>Column 1</td>
<td>Column 2</td>
</tr>
</table>

Example 3:

<table cellpadding="2" cellspacing="2" width="100%">
<tr>
<td bgcolor="#cccccc">Column 1</td>
<td bgcolor="#cccccc">Column 2</td>
</tr>
<tr>
<td>Row 2</td>
<td>Row 2</td>
</tr>
</table>
Example 1: (Tip)
Column 1Column 2

Example 2: (Tip)
Column 1Column 2

Example 3: (Tip)
Column 1Column 2
Row 2Row 2
<td>table data<table border="2" cellpadding="2" cellspacing="2" width="100%">
<tr>
<td>Column 1</td>
<td>Column 2</td>

</tr>
</table>

Column 1Column 2
<th>table header<div align="center">
<table>
<tr>
<th>Column 1</th>
<th>Column 2</th>
<th>Column 3</th>

</tr>
<tr>
<td>Row 2</td>
<td>Row 2</td>
<td>Row 2</td>
</tr>
<tr>
<td>Row 3</td>
<td>Row 3</td>
<td>Row 3</td>
</tr>
<tr>
<td>Row 4</td>
<td>Row 4</td>
<td>Row 4</td>
</tr>
</table>
</div>
Column 1Column 2Column 3
Row 2Row 2Row 2
Row 3Row 3Row 3
Row 4Row 4Row 4
<title>document title<title>Title of your HTML page</title>Title of your web page will be viewable in the title bar.(Tip)
<tr>table row<table border="2" cellpadding="2" cellspacing="2" width="100%">
<tr>
<td>Column 1</td>
<td>Column 2</td>
</tr>
</table>
Column 1Column 2
<tt>teletype<tt>Example</tt>Example
<u>underline<u>Example</u>Example
<ul>unordered listExample 1:<br>
<br>
<ul>
<li>List item 1</li>
<li>List item 2</li>
</ul>
<br>
Example 2:<br>
<ul type="disc">
<li>List item 1</li>
<li>List item 2</li>
<ul type="circle">
<li>List item 3</li>
<li>List item 4</li>
</ul>
</ul>
Example 1:

  • List item 1
  • List item 2

Example 2:
  • List item 1
  • List item 2
    • List item 3
    • List item 4